10 JoSuA manual
In the following sections you will learn how to log in to JoSuA, how to navigate through the JoSuA web interface, submit jobs and subsequently access the results. In addition, you will find advice on what to do in case of potential problems with JoSuA.
You can also find current answers to frequently asked questions about JoSuA on the FDZ website in the JoSuA FAQs. There you will also find a video tutorial to help you get started using JoSuA.
10.1 Login
Go to https://josua.iab.de/. JoSuA cannot be used with Internet Explorer.
At the login window, enter the username and the password that was provided to you by the FDZ (see Section 4.1). Each user receives an account for JoSuA after concluding a data use agreement. If several project directories are assigned to one person, this account applies to all project accesses.1
In case you have not received your login data yet or you forgot it, please contact the FDZ (iab.fdz@iab.de).
Sharing the password with others is strongly prohibited, not even within a project.
10.2 Start
After you have successfully logged in, the welcome page will appear. Its main menu consists of several tabs: Home, Projects, Submission, and Transfers, which will be described in more detail below, with Home as the pre-selected default. In the right upper corner, you can change your password or log out.
10.3 Home
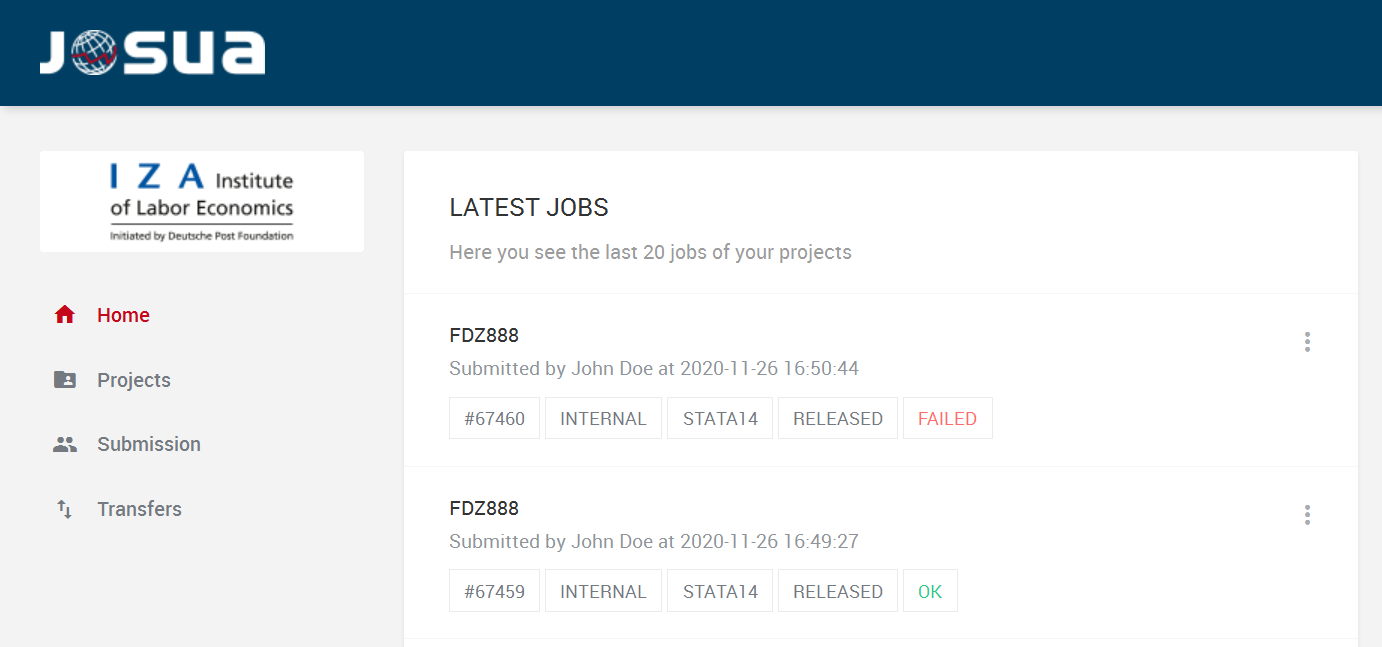
The Home tab, shown in Figure 2, provides a list of your latest jobs, their status and whether the job has run successfully.
One of the following status information, which represents the current status of your job within the workflow, will be visible here:
“running”: The job is currently being executed.
“censoring”: The job is censoring (Presentation/Publication Mode) or the png files are being created (Internal Use Mode - see also Section 10.10.2).
“released”: The job has been released.
The following additional status information may appear in the last field of the list:
“success”: The job has run successfully.
“failed”: The job has been interrupted. In exceptional cases, the status "failed" appears although the job has run through successfully.
“aborted”: The job was stopped before completion by the users themselves.
Simply click on the three vertical dots on the right to display details about the selected job.
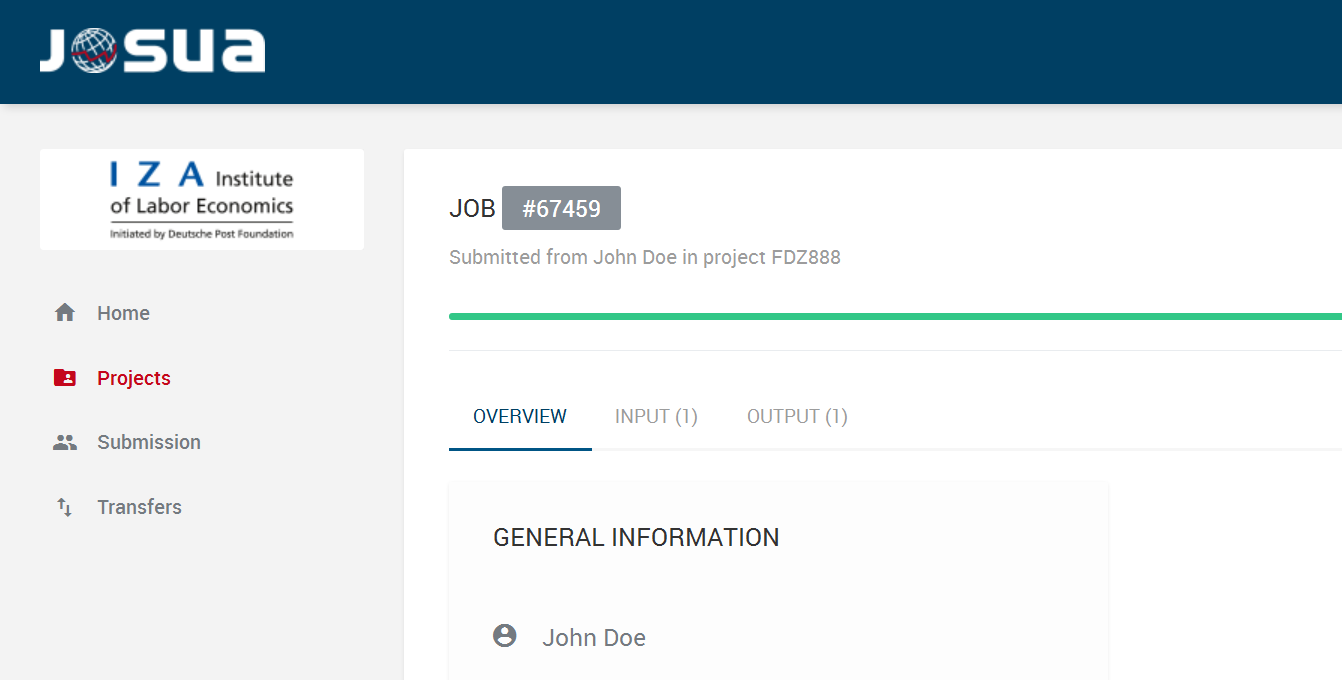
Beside some general information about your job (see Figure 3), in the job details you can find all submitted input files (in Input) and output files (in Output) that belong to this job. Currently, you can create a maximum of 20 result files for each job. All log-files (including any file lists) and graphics are counted. Log-files are automatically truncated when a file size of 2 MB per file or all result files of the job together exceed 8 MB. The presentation of the results depends on the mode in which the job was submitted.
-
Input (uploaded do-files):
- All uploaded scripts for this job are listed here.
-
Output (result files):
Internal Use: You can look at the results of your job by clicking on the respective output-file (log-file or graph) or on the icon on the right. Navigate through the preview window by clicking on the buttons in the bottom right corner. Please note that the results are only accessible as long as no new job in the Presentation / Publication Mode is uploaded in the same project.
Presentation / Publication: After your output has undergone manual data privacy control by the FDZ staff, all output files that have been accepted can be downloaded here. Please note that the link will not appear until this data privacy check is complete. To download your files, simply click on the respective filename or on the arrow on the right and save it to your computer.
10.4 Projects: Projekt List
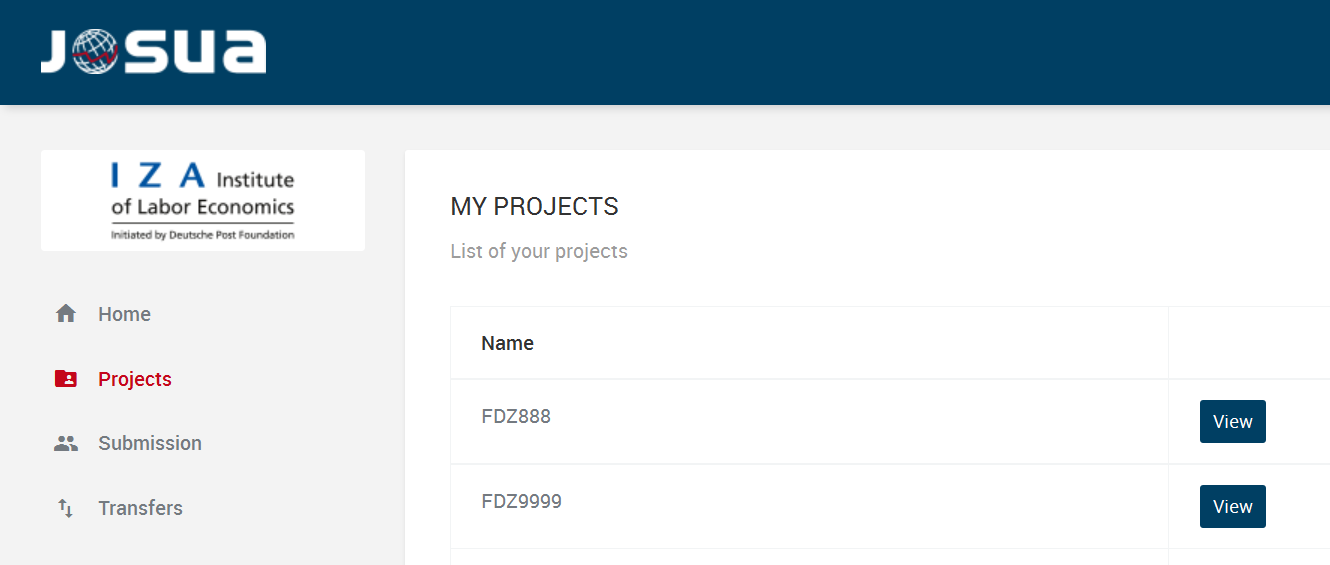
In the Projects tab, you can view all your current projects (see Figure 4).
Clicking on “View” will open the details for the respective project. Within this dialog, there are three tabs:
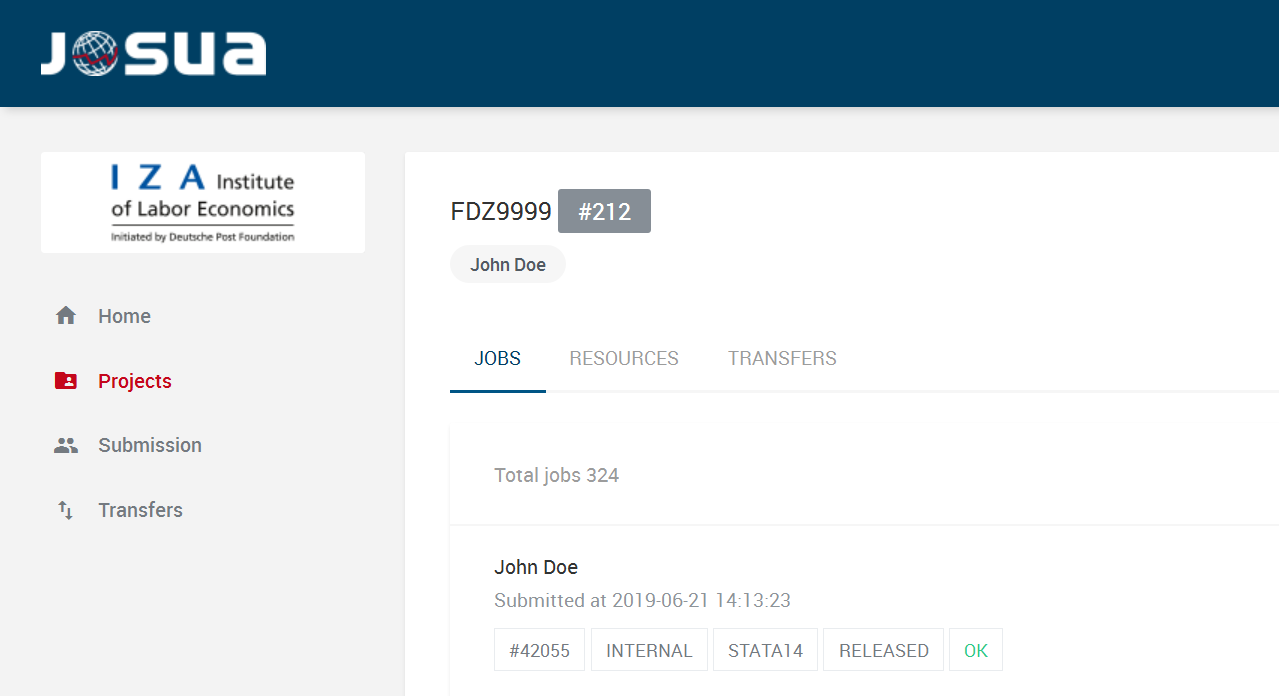
Jobs: Here you will find a list of the jobs of all users within the selected project (see Figure 5). In addition to general information, you can click on the three vertical dots on the right to access the same options that you find under Home (see Section 10.3).
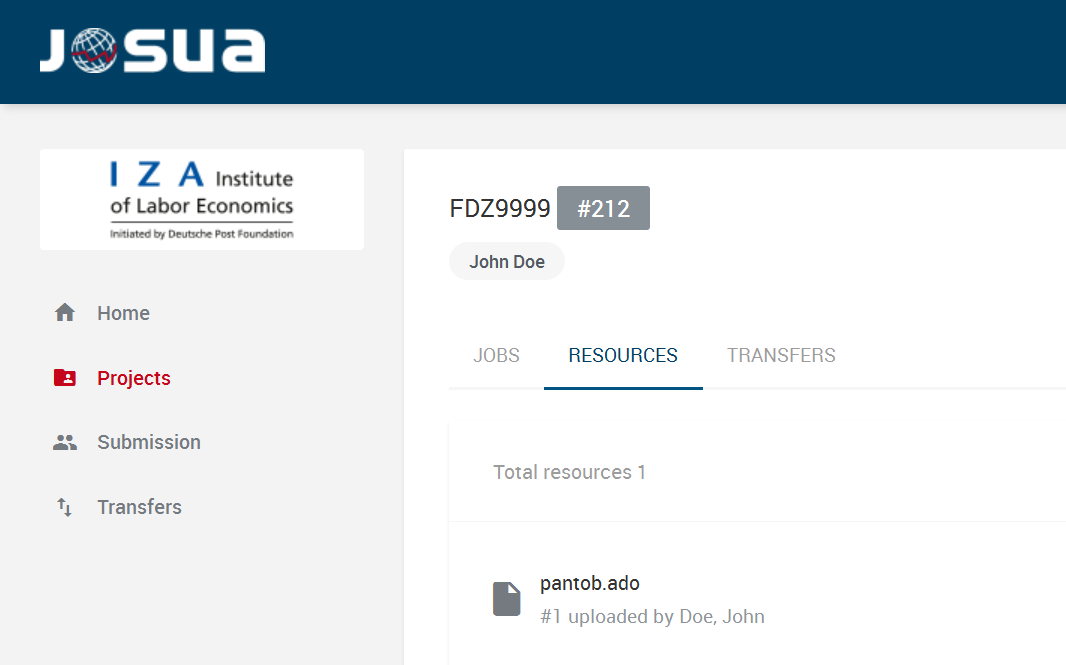
Resources: This tab is used to submit and store additional command libraries, e.g. Stata ado packages. Only upload ado-files for your project here (see Figure 6) if they cannot be installed via the
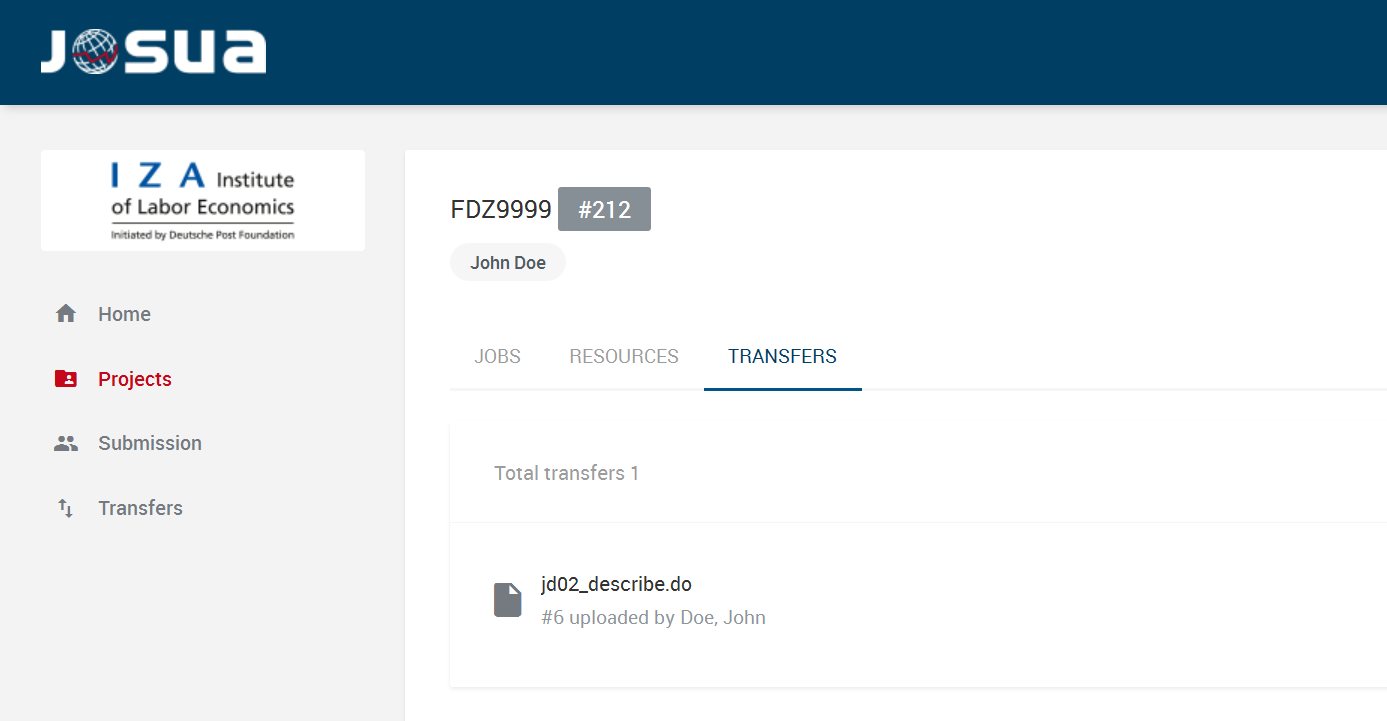
fdzinstallcommand from the packages available at the FDZ from the SSC archive (see Section 2.2.1)! All users of a project can add files that all authorised members can use for their jobs. If other project members already uploaded ado files, you can see them here. To add new files simply select "+" and drag and drop the desired file into the window or click in the window to browse and select the file on your hard disk. Please note that it is only possible to upload single files. If a file with the same name already exists, it will be overwritten (especially to be taken into account with changing versions of ado-files). Please note that only pure text files can be uploaded via Resources. Uploading other formats (such as .mlib or .plugin) is not possible (see Section 2.2.1). After a successful upload, the ado-file appears in the list, carrying the status "new". As soon as the ado-file has been released after a data protection review, its status changes to "accepted" and it is permanently available in the project for use within JoSuA. If the ado-file could not be released, its status switches to "dropped". In order to make ado packages that were uploaded via resources available for on-site use as well, they must be downloaded once during your visit and saved in the prog folder.Transfers: Here you will find a list of all the scripts that you have uploaded for transfer to this project before or after an on-site visit (see Figure 7). After the scripts have been reviewed by the FDZ staff (censored), you can download the files for further processing at home or via remote data execution by simply clicking on the file’s name or the arrow on the right-hand side. You can also upload new scripts by clicking on "+". For detailed information on transfers, see Section 10.7.
10.5 Submission: Uploading Jobs
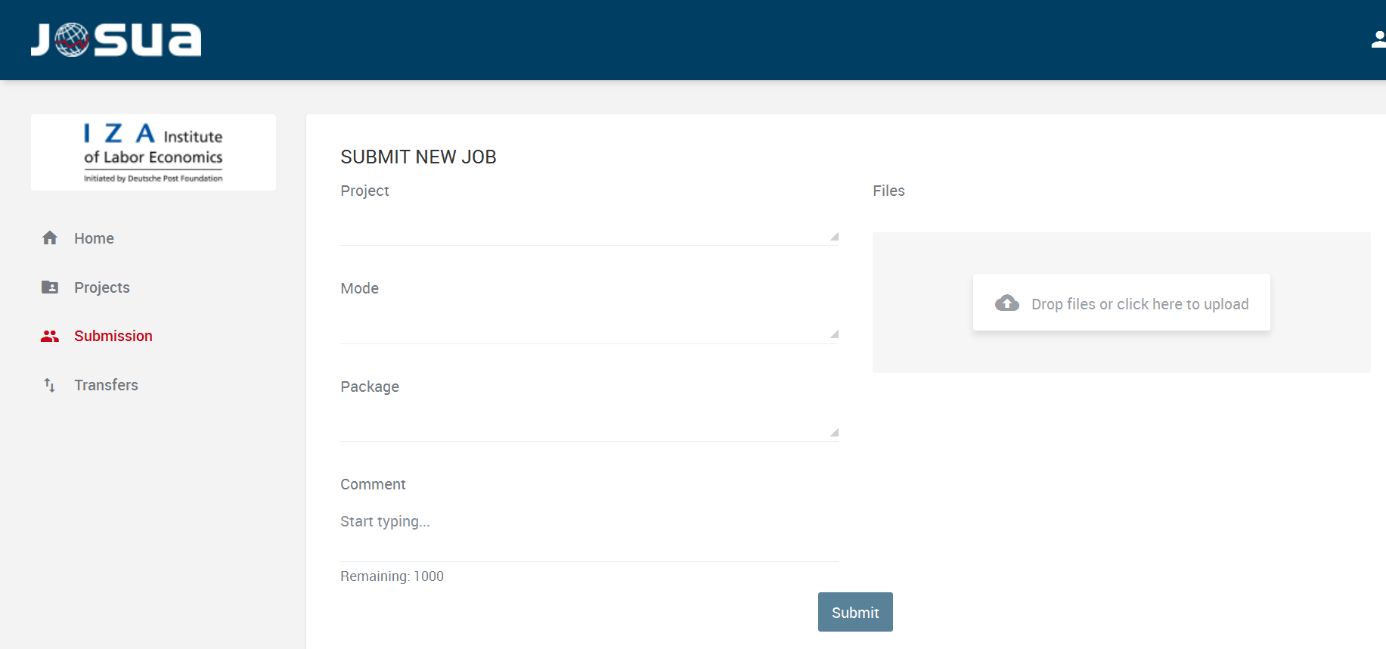
You can submit jobs by uploading scripts to the Submission tab (see Figure 8). All jobs you wish to submit must contain one file named master.do. All scripts that need to be executed have to be uploaded for each job. When naming script files, please use only the following characters: 0-9, a-z, A-Z, -,_.
Please select the project in the drop-down menu on the left side, for which you want to upload the job (e. g., fdz2020). In the second drop-down menu, you can choose whether your job will run in Internal Use or Presentation / Publication Mode (see Chapter 4). In the third drop-down menu, you can choose the software package, which should be used.
You can post an additional comment in the box below in order to provide any relevant details or explanations regarding your job. Please do not use special characters and limit your comment to 1,000 characters.
Afterwards, please drag and drop your scripts to the window on the right or click into the window to browse and select your scripts on your hard disk. Please do not upload more than 20 files per job, including the master file. The uploaded files are listed above the Browse button. You can check the list or remove single files. Once you are finished uploading your scripts, click Submit to send your job.
Please note that once you have uploaded a job in the Presentation / Publication Mode, you cannot upload any other jobs in the Presentation / Publication Mode until it is released. In the Internal Use Mode, it is theoretically possible to run multiple jobs in parallel. Also, while a job is running in Presentation / Publication Mode, additional jobs can be started in Internal Use Mode. However, we recommend to only use these possibilities in exceptional cases, e.g. if a job runs in Presentation / Publication Mode for several days. Thus, please upload a new job only after the previous job has successfully run.
10.6 Aborting Jobs
If a running job is to be stopped, you can do this yourself. Your jobs are listed in the Home tab. On the right side of the corresponding job there is a multifunction button with three vertical dots. This opens the context menu of the job. There is another similar button in the upper right corner, which lets you call a Stop Job action. Simply click this button, confirm the safety note, and the job will be aborted immediately. Following this, the job will now display the status "aborted". Jobs that were uploaded in Presentation/Publication Mode are not automatically deleted, but are ready to be checked and released by the FDZ. The FDZ then deletes these jobs manually. This means that no further jobs can be uploaded in Presentation / Publication Mode until they are finally deleted.
10.7 Transfers: Transfer of scripts before or after an on-site visit
You can upload scripts which you prepared at home for an on-site visit through the tab Transfers (see Figure 9). This applies not only to Stata do-files but also to scripts from other programmes such as R or Octave. In case you need the scripts you generated during your on-site visit for further developing at home or remote data execution, please upload them through the “Transfers” feature, too. Do not upload ado-files or other programme packages via “Transfers” (see Section 2.2.1).
Drag and drop the desired scripts to the window on the right or click in the window, to select scripts from your hard disk. Alternatively, you can also choose the Projects tab -> View -> TRANSFERS -> “+”. Please note that JoSuA only accepts upload ⁄ drag & drop of single files here, in contrast to uploading files under “Submission”. However, it is possible to upload multiple files in one archive file (.zip, .7z).
After uploading, the script appears in the list with the status ‘new’. Once the script has been approved after a data privacy check, the status changes to “accepted”. The scripts are now available for download. If the FDZ deletes parts of the scripts, the files are given the status ‘censored’. Usually, you will find a note about the deletions at the beginning of the script. In some cases, files are given the status ‘censored’ even though no deletions have been made. This is due to technical reasons. Under the Transfers tab, you can see all scripts that have already been transferred. You also have the option of downloading scripts that have been approved by the FDZ team. To do this, click on the script name or the arrow on the right-hand side.
For an archive file to be released, all of its contents must comply with data protection laws; otherwise, the entire archive will be deleted. Please note that when creating an archive file on a computer running macOS, system files/metadata are automatically created. These must be deleted by you before you upload the archive file to JoSuA. A deletion of the system files, which are not visible for yourself, can be done with the following command from the command line:
> zip -r data.zip . -x ".*" -x "__MACOSX"

10.8 Technical restrictions in JoSuA
There are some restrictions when using JoSuA, which are summarized again below:
A maximum of 20 scripts per job can be uploaded under "Submission", including the master file.
A maximum of 20 result files can be output per job. This includes also graphs and any file list.2
Maximum size of a result file: 2 MB. If a log file is too large, the file is truncated and a corresponding note is written in the log file. If a graph file is too large, it is deleted and the deletion is documented in a log file named "lost-files.log".
Maximum size of all result files per job together: 8 MB
Per project the subdirectory data is limited to the size of 30 GB
A maximum of 30 GB of working memory is available. Jobs that require more working memory at runtime are automatically terminated.
Only a limited number of jobs can be uploaded per day per project in Internal Use Mode or in Presentation / Publication Mode. The currently valid limits can be found on the FDZ website.
10.9 In case of job terminations with JoSuA
Should your Job terminate with the status “failed”, please check on your own the following aspects:
If a job terminates in Presentation / Publication Mode, please refer to the error message in the last log-file or any master.log, as well as any user comments from the FDZ,, which you can use to figure out the problem.
Check your programs for programming errors.
Please make sure that your programs meet our guidelines for data use, especially the path specifications.
Check the FAQ regarding JoSuA for indications on the cause of the error and possible solutions.
Only if these actions do not yield a satisfactory solution, please contact us. When doing so, please provide the following information:
Project number and job number in JoSuA
Detailed description of the problem (e.g. the exact wording of an error message)
NEVER transmit results that were created in Internal Use Mode or other outputs not approved by the FDZ staff! The transmission of non-approved results – even to the FDZ – must be considered a breach of contract.
In exceptional cases, the status "failed" appears, although the job has run through successfully.
10.10 Troubleshooting in JoSuA
In the following, common errors and their fixes are described
If you have any questions, please contact the Research Data Center (iab.fdz@iab.de). Please always include your FDZ project number (fdzXXXX) and, if applicable, the job ID from JoSuA.
10.10.1 Files cannot be uploaded
Under Transfers and Resources, files can only be uploaded individually (unlike under Submission). When transferring scripts before ⁄ after an on-site use (Transfers), however, you can pack the individual files beforehand (.zip, .7z).
10.10.2 Release of results in Internal Use Mode takes unusually long time (status "censoring")
Usually the release of results in Internal Use Mode is done within a few minutes. However, if JoSuA is heavily used, it may take several hours. Please wait at least 6 hours before contacting the FDZ.
10.10.3 Missing result files
After releasing the results, not all your result files generated within the job are available under Output. There can be various reasons for this:
Entire files were not released due to the data protection review. In this case, you will usually find information about the deletions in the comments or directly in your log-files.
More than 20 result files were generated per job. This also includes each individual graphic and any file list. JoSuA then only outputs a maximum of 20 (randomly selected) result files.
The maximum size of 2 MB per result file was exceeded. If a log file is too large, the file is truncated and a corresponding note is written in the log file. If a graph file is too large, it is deleted and the deletion is documented in a log file "lost-files.log".
(In Internal Use Mode only): There was an error during the conversion to png files. In this case, please contact the FDZ stating the project number and the job ID.
10.10.4 Error indication in the log-file "File not found"
This error indication occurs when the data path is not specified with the intended globals $prog, $data, $orig or $log. Please use the above-mentioned globals at every path specification because otherwise JoSuA cannot find the data files. Please be advised not to use German Umlaute, blanks or special characters in file names.
10.10.5 Log-file master.log ⁄ Error message "Log-file already open"
JoSuA automatically creates a log file called master.log. Please don’t create another master.log in your program. Use the command cap log close to close the present log file and subsequently open a new log file. For naming conventions please see the guidelines.
10.10.6 Error message "File not ok (suspicious mismatch between file suffix and actual file type)"
This error message appears when opening a log-file in Stata’s smcl format. Please create text-only log files. Use the commands "log using "$log\logfile.log", replace" or "log using "$log\logfile", text replace".
10.10.7 Error message "Error!"
The error appears when the combined size of generated output files exceeds 8 MB. Please modify your programs and make sure that less output is generated.